Friday, October 29, 2010

Weekend Project: Candy Corn Garland DIY


The folks over at Room6, a super-cute shop here in the lower mainland (Deep Cove) and (also online), sent us this cute little Candy Corn Garland DIY idea that they did for their shop window display and thought it might be something people would like to make this weekend. (Um...Yes)! They even sent us the link to download the template to make them! (See instructions below.)

And as a side, they are offering an online halloween treat this weekend! Save 20% off any purchase online through Sunday, October 31. Enter code: TREAT20 in the coupon box upon check-out and they will take 20% off the entire order!

Candy Corn Garland Instructions

1.) Download the template here. You can either create a stencil, or cut out the corn shapes and trace them. However you roll.
2.) Get yourself some cardstock in yellow, cream/white and orange.
3.) Cut out the 3 shapes and tape them together with clear tape.
4.) Sew 'em together (they used orange thread and sewed them about 2-3" apart.
5.) Hang 'em up & have a Happy Halloween!

(Thanks Megan!)

Little Winter: Poppytalk Exclusive Giveaway!

Image No. 1
Abby Powell-Thompson (abbytrysagain.typepad.com) and Chelsea Fuss (frolic-blog.com) are joining forces to present Little Winter: a handmade market (littlewintermarket.com). The event features artists and craftspeople from Portland and beyond and will be held at The Cleaners (acehotel.com) in downtown Portland, Oregon - November 6 and 7, 2010. The group of artisans will be selling clothing, house wares, paper goods, fine art, photography, vintage, purses, accessories and more.

Fourteen of the vendors have donated wares for this exclusive Poppytalk giveaway! The giveaway includes 15 items shown here that are collectively worth more than $400! One lucky winner will receive these goodies. (The giveaway is open to those in the US and Canada).

The giveaway will run today (Friday, October 29/10 at 12:00 AM. until next Wednesday, November 3rd/10 at 11:59 PM. Abby and Chelsea will be announcing a winner either Thursday the 4th or Friday the 5th. Please leave a comment "here at this post only" in the comments section to enter!

Giveaway items:

Image No.1: (above) two travel size perfumes from Twigs & Honey (twigsandhoney.com), a Fieldguided tie (fieldguided.blogspot.com), and an 8"x12" print from Abby Try Again (abbytryagain.bigcartel.com)

Image No. 2
Image No.2: a handwoven loop scarf from Secret Pocket (secretpocket.bigcartel.com), an assortment of ten letterpress cards from Tokketok Press (tokketok.com), an Imagination poster from Mossiere (mossiere.com), and a large dotted garland decal from Shanna Murray (shannamurray.bigcartel.com)


Image No. 3Image No.3: hand knit socks from Garment House (garmenthouse.bigcartel.com), a necklace from Sulu Design (etsy.com/shop/suelieu), mechanical animals from Julianna Swaney (ohmycavalier.co), a print from Amanda Blake (amandablakeart.com)


Image No. 4Image No. 4: a postcard set from Cori Kindred (corikindred.com), two prints from Kiki&Polly (kikiandpolly.com) and a tiny house from My House Party (myhouseparty.net)

Thursday, October 28, 2010

Today at Poppytalk Handmade


1. Color Burst Bowl, Up in the Air Somewhere
2. Pillow With A Bird in the Clouds, Leililaloo
3. Milk Glass Earrings, Anne Holman


4. Adventure Bird Pattern Fabric, Andy Eats Only Candy
5. Creativity Pendant, Mad Tea Garden
6. Seastorm MiniScarf, All in Stitches

Wanderlust: Traveling Retail Cart


Oh to hook up a freshly painted vintage trailer and hit the road selling vintage and handmade goods! A secret dream of mine, and well, that's just what owners, Vanessa and Dan Lurie did creating their traveling retail cart, Wanderlust.

Wanderlust, Portland's first traveling retail cart, is starting the holiday season off with a bang. After several 'soft-launch' events at food cart pods and outdoor markets around Portland during the Fall of 2010, their operation is up and running smoothly. Now they're ready for action- planning a grand opening party Saturday November 20th where you can expect cupcakes, a raffle, a wheel you spin for a discount on every purchase and some amazing vintage and handmade goodness all in conjunction with the Waterheater's Bazaar Bizarro flea market in Portland.

At Wanderlust shoppers can expect a nicely curated selection of vintage clothing including over 100 amazing dresses packed into their 10'x 7' shop. Men's western style button-ups hang inside the newly renovated 1969 Cardinal trailer along with the cutest handmade items from local and international artists such as Mary Kate McDevitt from Portland and Showpony out of the UK. Who knows where the future will take this little shop, there are even whispers of visiting San Francisco and Seattle in the Spring and Summer of 2011. Visit www.wanderlustmobileshop.com for the rest of their Holiday 2010 schedule and watch for them on the streets of Portland and other areas reachable by land.


Images from Wanderlust and Modish

The Desk Set


Contributor post by Eva Jorgensen of Sycamore Street Press

We're moving studios this weekend, and while dreading the actual moving part, I can't wait to get organized in our new space. When it comes to my desk accessories, I can't decide if I want to stick with my current multi-colored decor or try and move to a more understated palette... so I've made an inspiration board for each. Which would you pick?

Clockwise from top left: Know It All Pencil Set at Paper Pastries, Cherry Crayons at Present & Correct, Pear Jars at the MoMA, Cork Backed Desk Clips at SusyJack*,  Multi Chevron Pen at Paper Source, Yellow Owl Woodland Notepad Set at Chronicle Books, Amigo Desk Accessory at the MoMA, Pretty Apple Cotton Tape at Cute Tape,  Metaphys Viss Spiral Eraser at Jet Pens.


Clockwise from top left: Wood Frame Slate Chalkboard at Three Potato Four, Wooden Roller Ball Pen at Jet Pens, Things To Do Notepad Set at The Small Object, The Grid Notebook by Jason Munn at Little Otsu, Choco Tape Dispenser at the MoMA, Beech Wood Stapler at Present & Correct, Antique Arc Neck Lamp at Three Potato Four, Black Pencil Gift Set at Cute Tape.

5th Annual Holiday Ornament Swap


The Holiday Ornament Swap is on again this year at freshlyblended and after much deliberation and concern for the swaps' loyal returning swappers, organizers have decided that the swap will go back to it's original layout and they will not be using swap bot this year.

Each swap group will be hand organized and each swapper will be able to swap within their group rather then using swap bot. They feel the swap will be more personal and meaningful this way. The past few years they've lost a lot of important swappers from the design and craft world and they hope to spark their interest once again to be apart of this world wide handmade giving spree.

Sign ups will begin on NOVEMBER 1st at freshlyblended.blogspot.com.

Pikabooks


After blogging about art & illustration for almost 3 years on Pikaland and as an editor of magazines + books for the past 7 years, Amy Ng is now publishing limited edition art & illustration related zines and books under the name, Pikabooks.

For their inaugural zine, her friend and artist Mogu Takahashi has drawn a zine that teaches the basics of the Japanese language! The zine will be bundled with an A2 size poster, and is available in a limited edition set of 200.

They are celebrating the launch of their first book with the coupon code YAYPIKA that will enable patrons to get 10% off their order, and Amy would like to extend this to all Poppytalk readers as well! Congrats Amy!

pikabooks.com

Wednesday, October 27, 2010

Inkello Letterpress Calendar Giveaway!


Christy of Inkello Letterpess is hosting a giveaway on her blog for her 2011 Matchbook Calendars. Available in three scrumptious colors each one is hand printed and perforated on their antique tabletop letterpress, then collated and assembled by hand. A limited edition run; 120 calendars were printed. Visit her blog here to enter.

{ Poppytalk Handmade Table no.: 138 }

DIY: Screenprinting with Little Korboose


Hi there! It's April Nemeth over at Little Korboose! I do a TON of screen printing and because it is such a big part of my life — I wanted to share it with you!

There are several different substrates you can screen print on including paper, fabric, wood...just about anything with a flat surface. Today I am going to walk you through screen printing on wood with permanent acrylic water soluble inks. I recommend SPEEDBALL inks because, well, they’re the best!

You'll need a few things before you start:
A table (about the size of a card table)
speedball acrylic permanent water soluble ink
2 hinge/clamps + screws
squeegee
substrate to print on
paper towels
apron
Tupperware + lid for ink
masking tape
ink spatula
soft scrub brush

SET UP
You can find or build a wood table that is a comfortable height for you to lean over when printing. Make sure you have access to a large laundry tub or sink so you don't have to go far to clean up when finished. Make a drying rack if you plan on printing a large number of prints. You'll need to bolt the 2 hinge clamps to the table evenly spaced apart. These can be purchased at any silk screen supply shop or online. When you bolt them into the table, be sure they are right side up. The hinge clamps allow you to lock the screen in place for registration purposes. They also make printing go fast!

PREPARING THE SCREENS
You will need a separate screen for each color within your design. Remember to incorporate registration marks into your design so you can line up your colors properly./easily. There are several different ways to prepare a screen to print a design and while the methods are different, the basic principle is to make a stencil on the screen which allows ink to be forced through it's “open” areas to produce a design. There are various resources online regarding this topic so I am not going to go in depth. Just to give you an idea the methods include:

Paper Stencil Method, Screen Filler Method (Direct block out|negative method), Fluid Screen-Filler Method (Tushe-resist|positive method), and the Photographic Emulsion Method (most common - the one I use).

There are many companies that will prepare your screen for you with your design or you can do it at home yourself if you have all of the correct supplies.

Once your screen is ready, mask of the inside parameter with masking tape. This will allow for easy clean up once you are done printing with the screen.


PRINTING
Insert your screen frame into the hinge clamps and tighten as hard as you can. It is important that the screen does not move for registration purposes. To perform OFF-CONTACT printing, I tape a couple of pennies to the table where the screen frame lies to elevate it. Pull screen down. Place substrate under the screen and position it as it is to printed, allowing for margins When you think the wood is in the correct position, lift the screen and mark where each corner of the wood should be placed. I actually draw crop marks directly on the table with a pencil. Good guides are important if you intent to print one or more colors on any print.

Stir the ink until you get a creamy consistency. You can mix inks to get your desired color. I use water based acrylic speedball inks for printing on wood as well as paper Spoon ink across the end of the screen farthest away from you.


Lift screen slightly with one hand, take squeegee in other hand and apply an even, smooth blanket of ink onto the print area. This is called FLOODING. Drop the screen gently. Lift the squeegee with both hands over the ridge of the ink and pull toward yourself – keeping squeegee at a 45° angle with enough pressure to scrape screen clean. Lift screen, remove print and FLOOD screen again. REPEAT on next piece of wood.

That’s it! It is time consuming and a lot of work, but it is also SO FUN! Once you start screen printing you will not be ale to stop. It’s highly addictive!


CLEAN UP
When finished printing remove any remaining ink with an ink spatula and save in a plastic ware container with a lid. Remove screen from clamps and wash out in a large tub/laundry sink with warm water and a soft brush (this is for water soluble inks only).

That’s it! It is time consuming and a lot of work, but it is also SO FUN! Once you start screen printing you will not be ale to stop. It’s highly addictive!

TIPS:
*have a generous quantity of ink on screen.
*flood screen evenly
*maintain even and adequate pressure on the squeegee when pulling.

littlekorboose.com

Spooky Inspirations!


I love this time of year, not only because it is my birthday, but when I lived in the UK, it was a magical time of year for me and the girls.

Witches and ghosts, nights getting darker, the clocks changing, kicking through leaves on wonderful autumnal walks and the beginning of the lead up to Christmas. 

October is all about celebrating the harvest, thanksgiving for the Americans and the winter setting in.  A truly lovely time to reflect on the year, get ready for the festive season and start to think about decorating the house.

I have done some deep cleaning of my house this past week and goodness did it need it after our busy wedding season, but now we are planning on a pumpkin carving day tomorrow with my daughters and enjoying a trick and treat filled weekend with lots of spooky dinners and activities!!

I love these photos above of inspirations for decorating the house, it is so easy to buy horrible tacky plastic things, but to use leaves, pumpkins (by the way available here from Supersol!) and little details such as black candles, coloured table linens, lots of oranges and blacks makes a stylish Halloween theme in any house. 

OK I confess I have pumpkin fairy lights over my mirror in the dining area plus my wonderful Whittards of Chelsea ceramic pumpkin and ghost candle holders as well, but we will be beautifully decorated for our spooky weekend by tomorrrow evening!!

If anyone is planning a spooky themed night we do have black table linens, black chair covers and lots of orange sashes!  A fair amount is going out this weekend for spooky dinner parties but if you are looking for something different contact us!

Happy haunting to you all and hope you have a lovely weekend!

Images courtesy of Country Living, a wonderful website for inspirations :)

shandrus creations: custom recycled-wood wedding signs + more

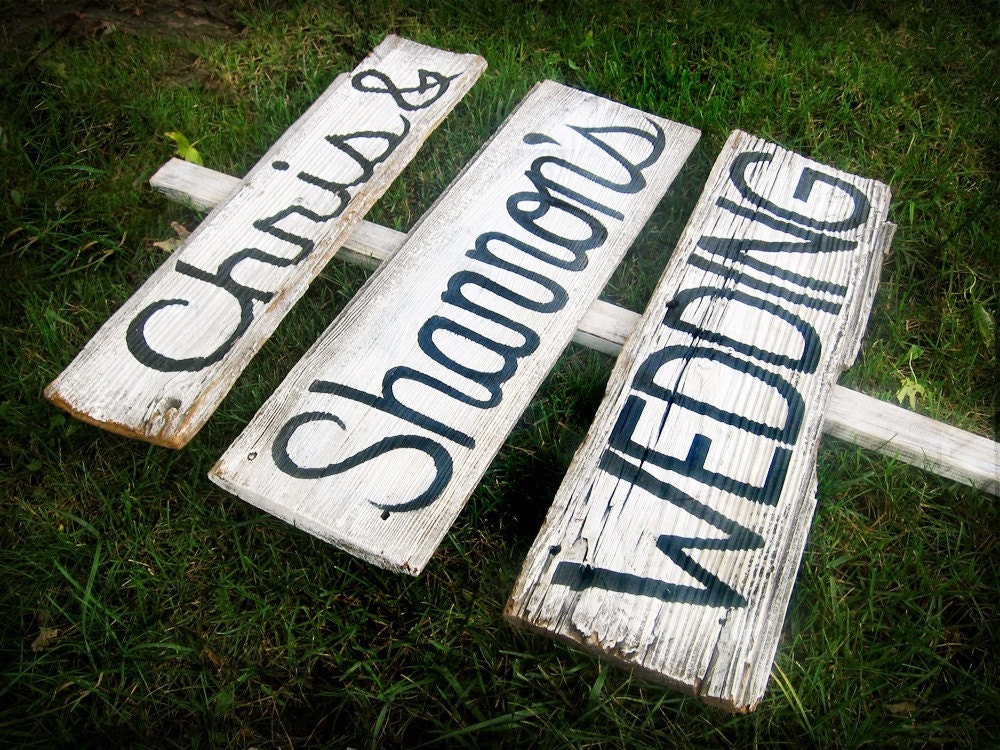
shandrus creations CUSTOMIZED Barn Wood Wedding Sign
{ customized recycled barn wood wedding sign }

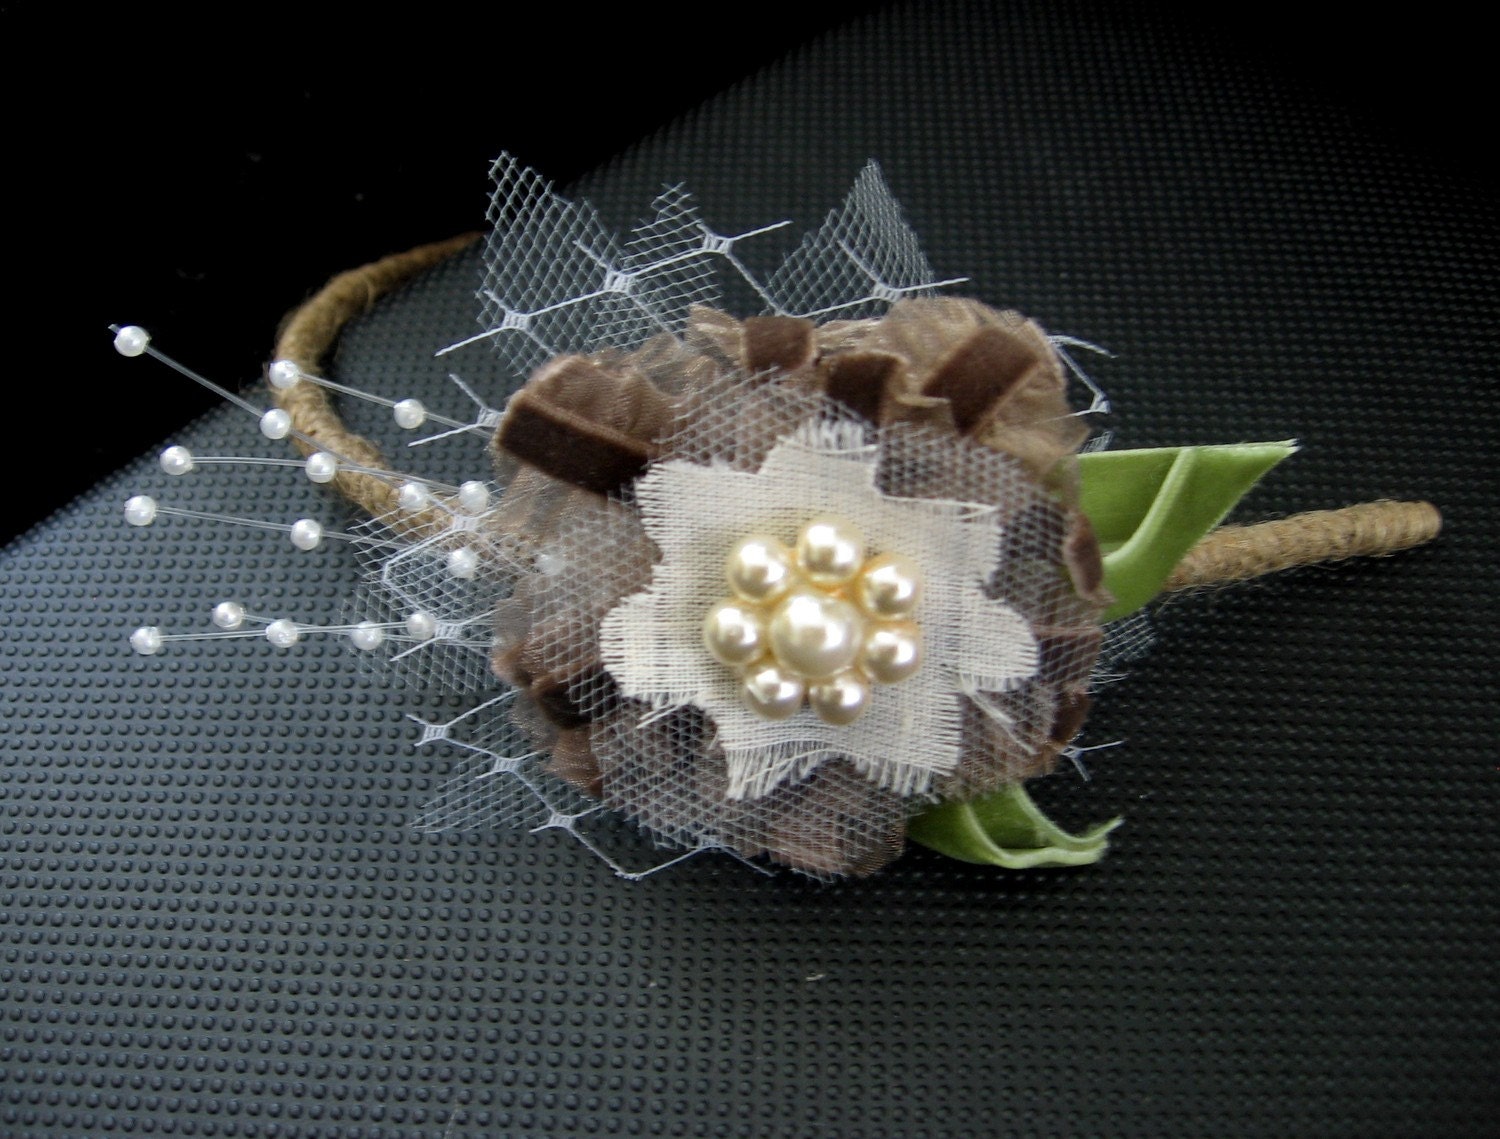
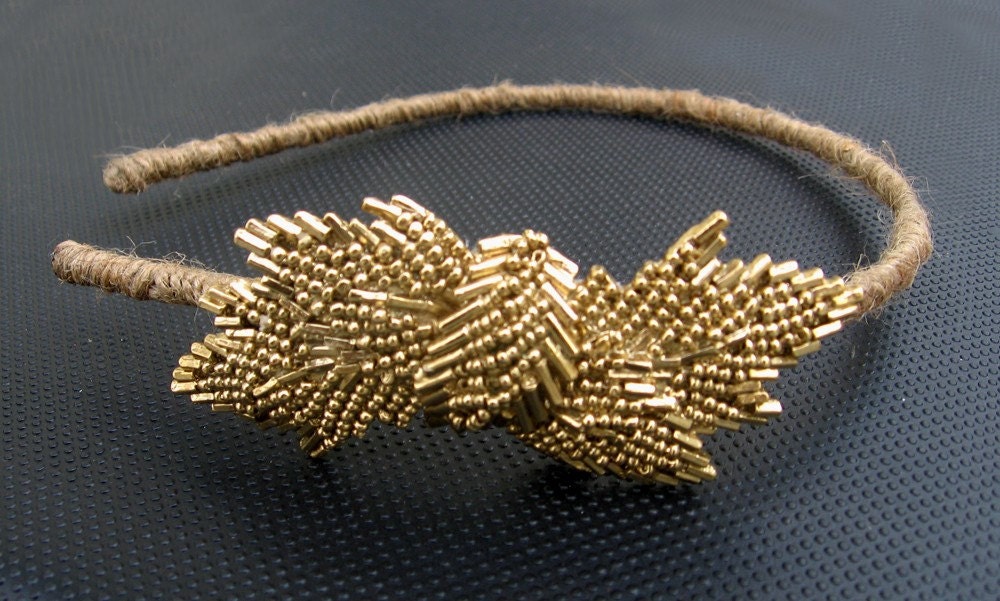
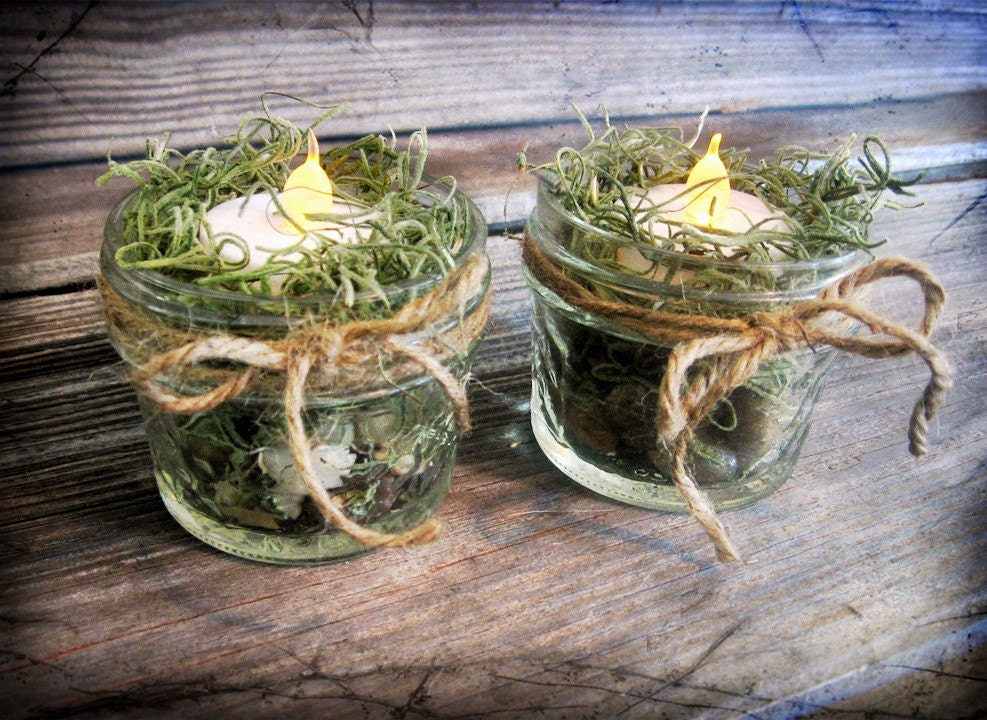
newlyweds (in sept!) chris and shannon got so much great feedback on their handmade wedding that they started an etsy store. they make everything: charming custom signs made from recycled barn wood. sweet hair clips and bands. mason jar tea lights. earthy, vintage, lovely!

also: they made their own *beer*. for their wedding. check out the adorable photo of them after the shop highlights below.

CUSTOMIZED Barn Wood Arrow Sign Woodland Head Band - READY TO SHIP
Athena Head Band - READY TO SHIP CUSTOMIZED Barn Wood Just Married Sign
CUSTOMIZED Barn Wood Ceremony and Reception Signs Vintage Inspired Hair Clip - READY TO SHIP
Mason Jar Tea Lights CUSTOMIZED Barn Wood Wedding Sign
more at shandruscreations.etsy.com

arrowus.jpg

It's Easy Being Green: Simple Braised Greens

By Jeannette Ordas of Everybody likes Sandwiches


Even though summer is over with, we're still receiving our weekly CSA (community sponsored agriculture) share. The zucchini and green beans have dwindled, but the leafy greens keep going strong. Every week I get a big bunch of chard, kale or mustard greens and I make sure that I prepare it within a day or so. Carrots, beets and winter squash can wait in the crisper until inspiration hits – but the greens must be eaten quickly or it's wilt city.

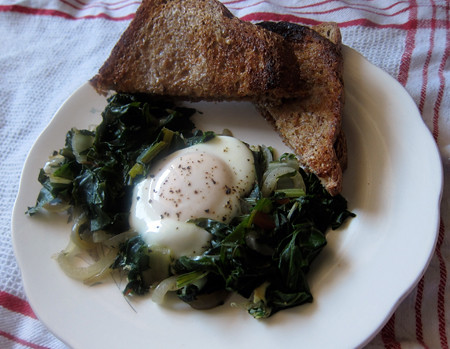
One of the simplest and easiest way to prepare greens is to braise them. I like to use a bit of stock (veggie or chicken works well) but I've also used pasta water when the need arises. Braised greens seem like a humble dish, but don't let them fool you. While these greens work well as a side dish, they become truly transformative thrown on top of a bowl full of soft cheesy polenta or tossed with some noodles. Or eat them for breakfast like I did because a perfectly poached egg and some buttered toast certainly does these greens no harm at all.


Simple Braised Greens
2 tablespoons olive oil
1 small onion, sliced thin
4 cloves garlic, sliced thin
1 bunch mustard greens (or spinach)
1 large bunch of chard
2 tablespoons vegetable stock
1/2 lemon
salt & pepper

Prep chard and greens by removing any hard stems. Rinse well under cold water and slice each bunch into one inch ribbons.

In a large skillet heat olive oil over medium heat and add in onion and garlic. Saute until soft and lightly golden. Add in the greens, stock, and sprinkle with a bit of salt. Stir about until they turn wilty and deep green - about 5 to 10 minutes. Give a good grind of pepper and squeeze in the lemon juice. Stir once more, checking seasoning and serve immediately.

Inkwell & Argent Dinnerware


From Inkwell & Argent; Fluted ceramic is stamped with an inky, imperfect rendering of a traditional motif, then filled in with mirror-shiny silver for a modern take on classic china patterns. Available at Anthropologie.

Tuesday, October 26, 2010

giveaway results: seababe jewelry

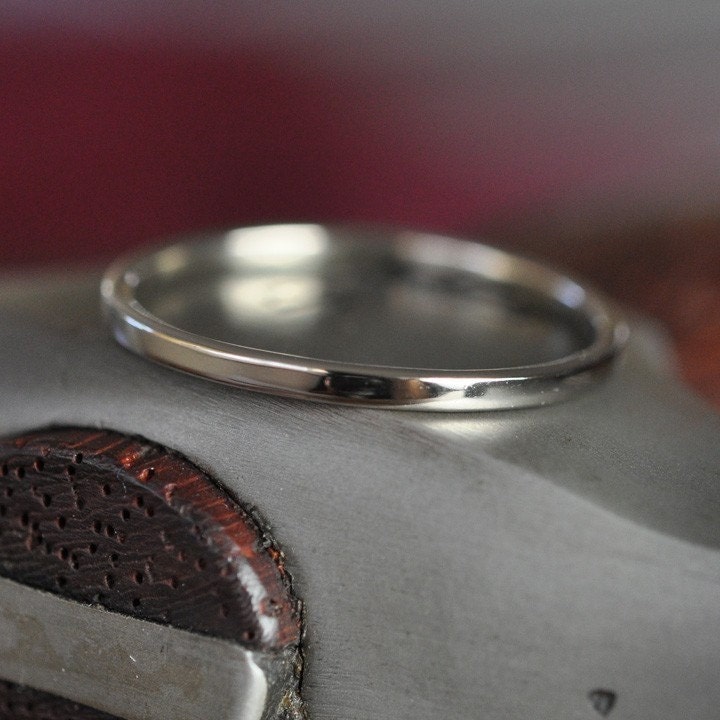
Skinny 14k Palladium White Gold Ring, size 2-8 Skinny 14k Rose Gold Ring, size 2-8
{ skinny 14k white, rose, or yellow gold ring }

thank you so much again to everyone who entered the seababe giveaway last week -- for all your stories and honeymoon wishes and hopes and dreams! i hope all of you get to escape somewhere soon and wish you safe travels.

as chosen by random.org: alyssa o'leary, send me an email at etsywedding (at) gmail and i'll connect you with seababe. wishing you all happiness!

for all the folks who entered with wedding dates, please keep david & kristin's eco-friendly rings in mind. super affordable -- including a silver wedding set (*set!*) for $87 -- and simply beautiful.

to seababe, for your generosity in offering the giveaway -- mahalo!

Sweet Chatelaine Downloads!

popcorn

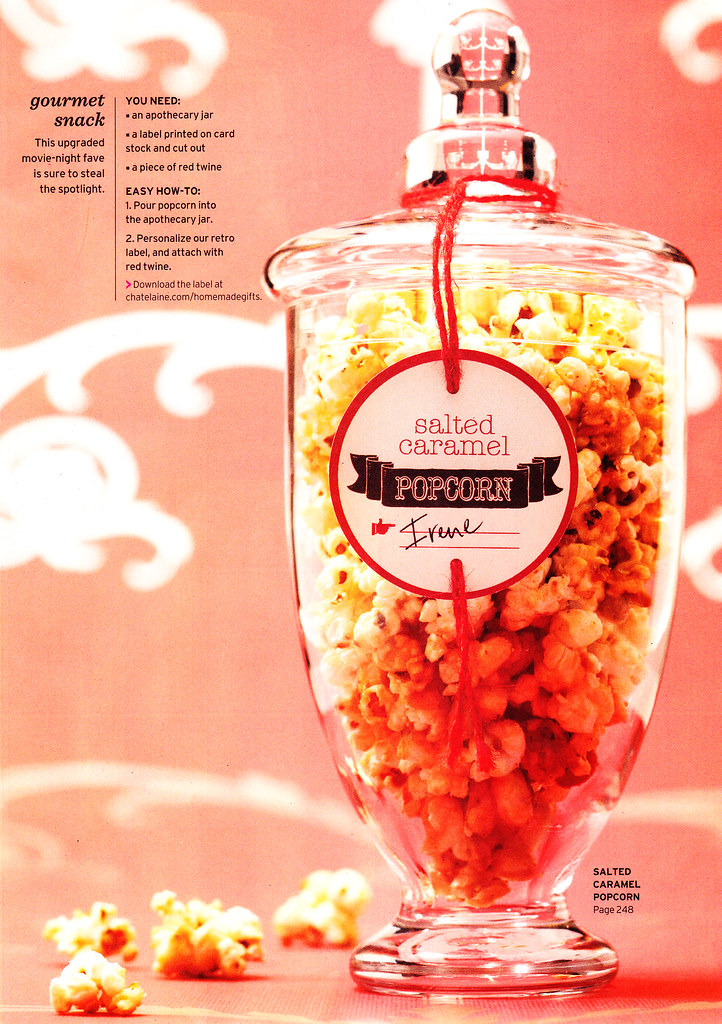
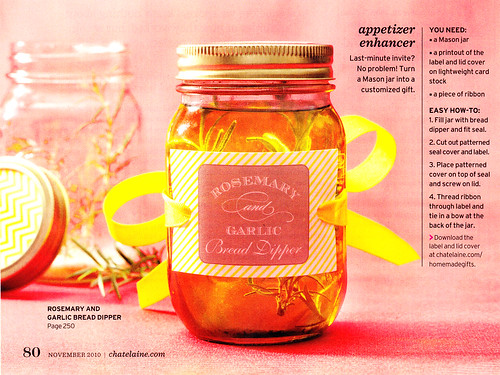
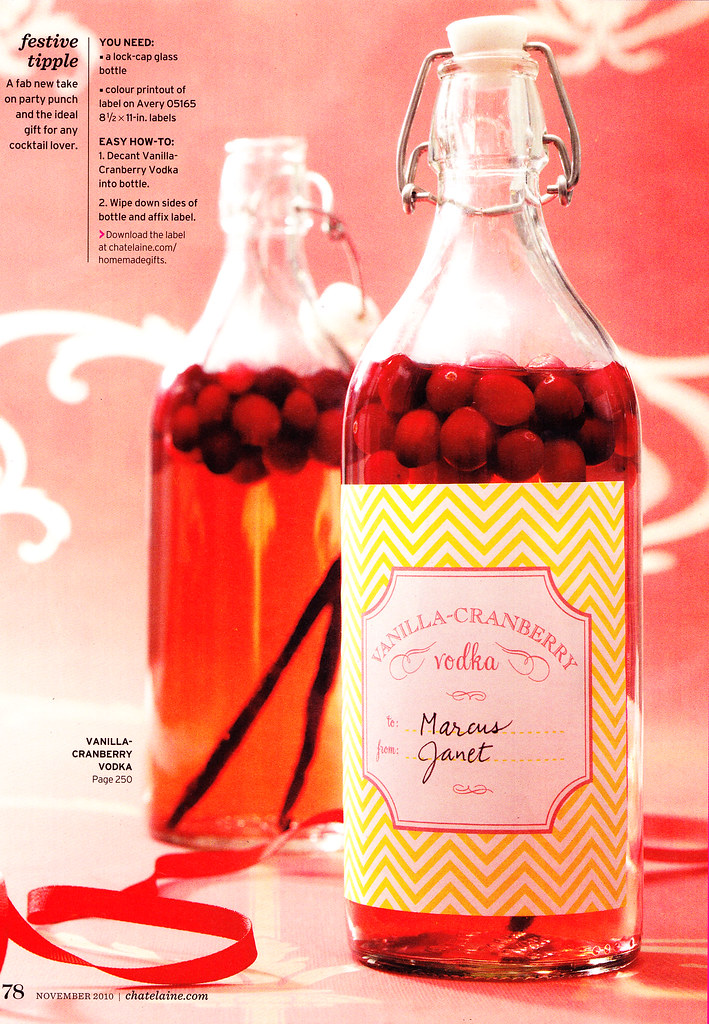
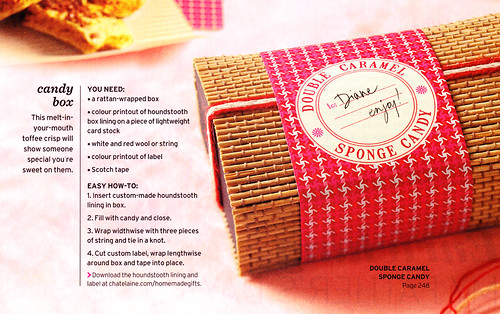
This weekend I picked up the November issue of Chatelaine Magazine and came across these sweet downloads (by lovethedesign.com) for an Edible Gifts feature they had. I love the idea of giving food as gifts, and when they're packaged like this who wouldn't love getting them too! They've posted the downloads on their website and if you're not in Canada and can't pick up the magazine and wish to have any of these recipes, just give me a shout and I'll pass them on to you. See direct links to each download, after the jump!


jar
cranberry

candybox

1. Salted Caramel Popcorn
2. Rosemary and Garlic Bread Dipper
3. Vanilla Cranberry Vodka
3. Double Caramel Sponge Candy

The story in Chatelaine was produced by Christine Flynn and Virginie Martocq and photographed by Roberto Caruso.

Autumn Poppy, by Natalie Tweedie


I am more than pleased today to feature the newest work from Natalie Tweedie of Nebo Peklo. Natalie's been away from the design and blog world for a few years now (her blog was an old haunt of mine); but she is now re-launching her work with her newest piece through The Working Proof gallery.

The Working Proof will be showcasing her first ever letterpress print of her line drawings and has been produced as a limited edition of 100.

Autumn Poppy is a four colour letterpress print on 300gsm Somerset Rough 100% cotton paper (8.25 in. x 11.7 in). It is on sale for $60 and 15% of the proceeds will go direct to the Show Hope charity who are dedicated to orphan care and facilitating adoption.

As Natalie mentioned in her email to us, "Letterpress suits my line work so well, and I love the textural qualities that the medium it provides to my artwork. I worked with a great letterpress company in the UK called Blush°° Publishing to produce this print. I chose colours that remind me of my favourite season, Autumn...Burnt orange, yellow ochre, rich purple and warm grey."

theworkingproof.com
nebopeklo.typepad.com

Hindsvik: Living Room - Before and After

The Living Room BEFORE

Hi There, it's Daniel and Valeria from Hindsvik Shop! This week we'd like to share one of our recent home renovation projects: our living room makeover!

With a little paint, wood and color, we've managed to turn our living room into a modern and comfortable space that fits our mix of vintage and modern decor pieces.

The Living Room AFTER

Mix of modern and vintage colorful pillows.

Our DIY shelving unit made of plumbing pipe and reclaimed barn wood.

West German pottery collection. We love lava vases!

Another DIY bench for the entryway and antique coat rack.

Wooden key holder.

A vintage entertainment unit with a faux-bois finish and mid century magazine rack.


Safari chair and industrial floor lamp.

Pictures of lava fields from one of our trips to Iceland.
Hope you enjoyed our living room makeover! With a little paint, textures or themes and colors, it's so easy to create a comfortable and updated space. See you next week with more!